1. Log in to ASAv
See Logging in to an ASAv for more information.
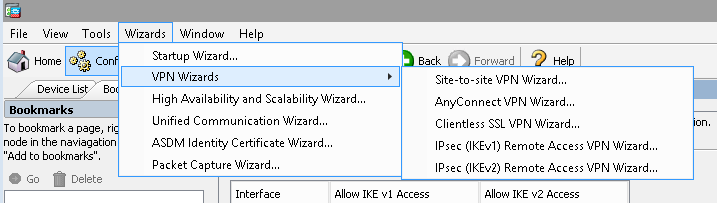
2. Run VPN Wizard
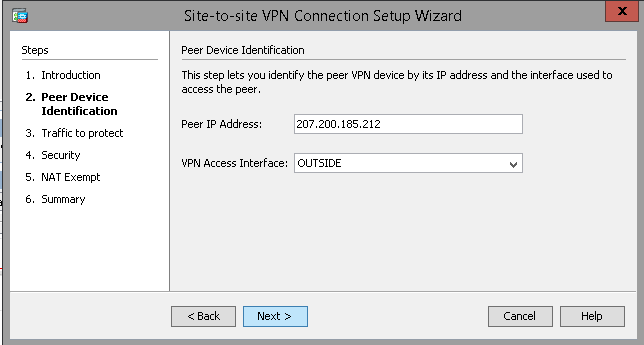
Input the Peer IP and select OUTSIDE.
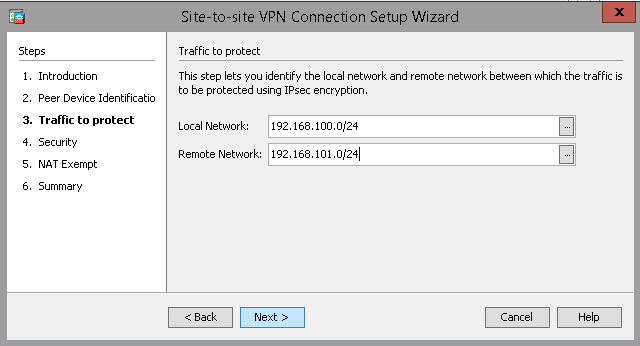
Input the Local and Remote network addresses in CIDR notation.
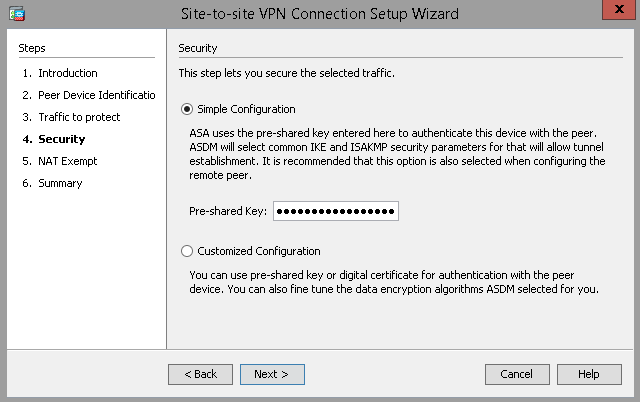
Select Simple Configuration and input the PSK.
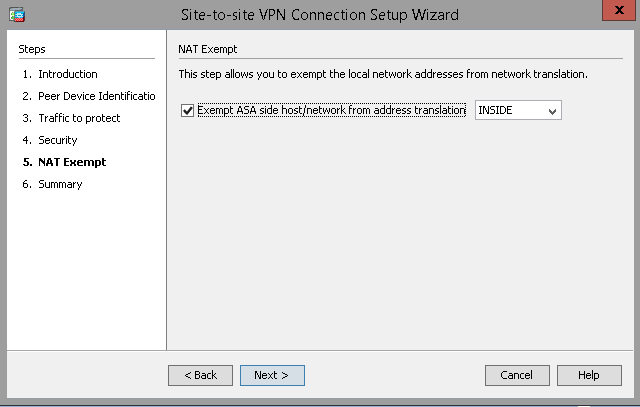
Select Nat Exemption on the INSIDE interface.
Then finish the wizard.
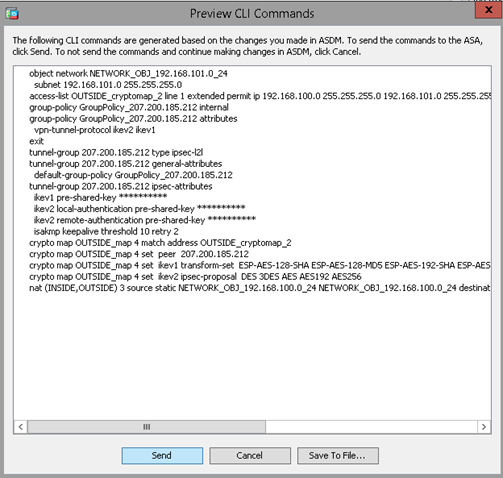
3. Apply Commands
Send the resultant commands to the ASAv. There will be informational errors since some IKEv1 crypto map settings have been deprecated. However, the VPN commands should still create the necessary rules on the ASAv. There may be another CLI Command window which appears after this. Select “Send” again and wait for the ASAv configuration to load.
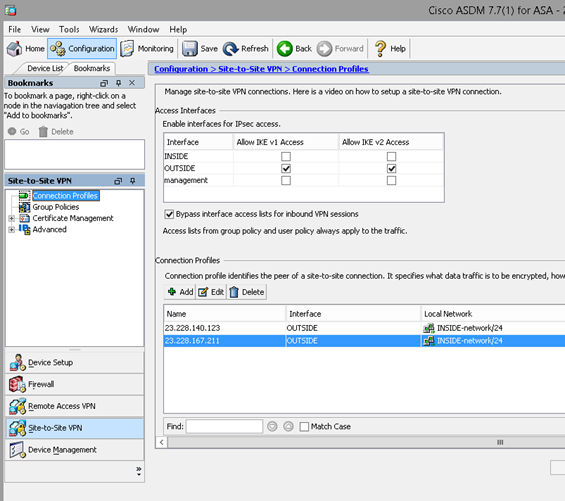
4. Save Configuration
Once the configuration has been applied to the ASAv, navigate to Configuration in the top left, then select “Site-to-Site VPN” in the lower left-hand corner. Expand the Connection Profiles section. Ensure that “Bypass interface access lists for inbound VPN sessions” is checked. This will enable VPNs to pass traffic in both directions. Verify that the settings listed on this page in the “Connection Profiles” section look correct.
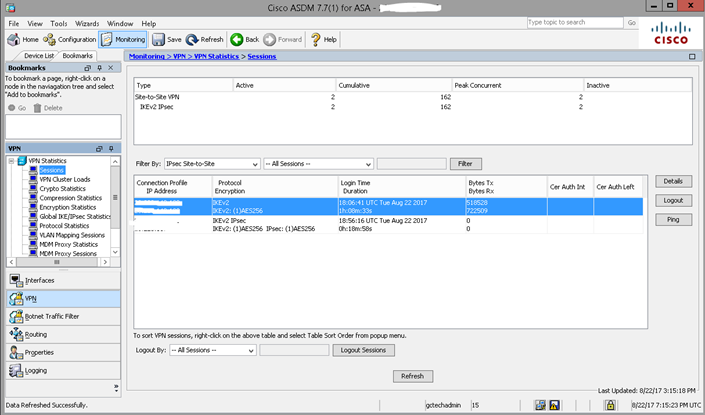
5. Test Connection
Navigate to Monitoring at the top, then select VPN in the lower left-hand corner. This will list connection statistics for each VPN configured on the ASAv. Attempt network communication across the network and select “Refresh” at the top. Verify that the Bytes transmitted and received in the lower half of the main window increase in value.
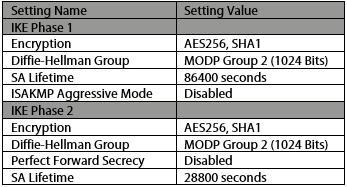
6. ASAv VPN Default Settings
See below for a list of Cisco ASAv default VPN settings. These can be changed, but are best configured as shown on the receiving end.