The SSL VPN-Plus functionality on the Advanced Edge Gateway allows users to connect to an internal VPN managed by the Edge. In this way end users can connect directly to the edge gateway’s external IP in order to access their servers. This gives users a secure method by which they can remotely manage and connect to their GreenCloud IaaS environment.
1. Configure Authentication Service
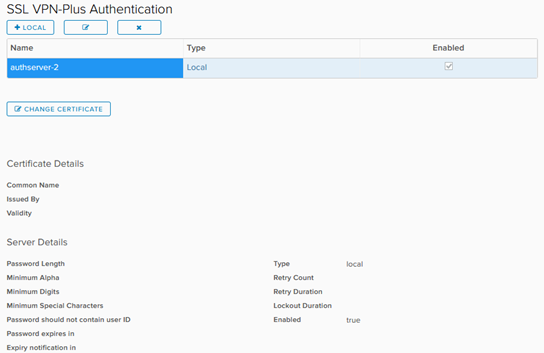
In order to begin SSL VPN-Plus configuration, navigate to the Edge Gateway, then right-click and select “Edge Gateway Services…” Select the “Authentication” tab to verify that an authentication server has been enabled on the Advanced Edge Gateway. Certificates can also be installed to the Authentication server at this screen.
2. Enable & Configure SSL Server
Navigate to the SSL VPN-Plus tab, then the Server Settings sub-tab.
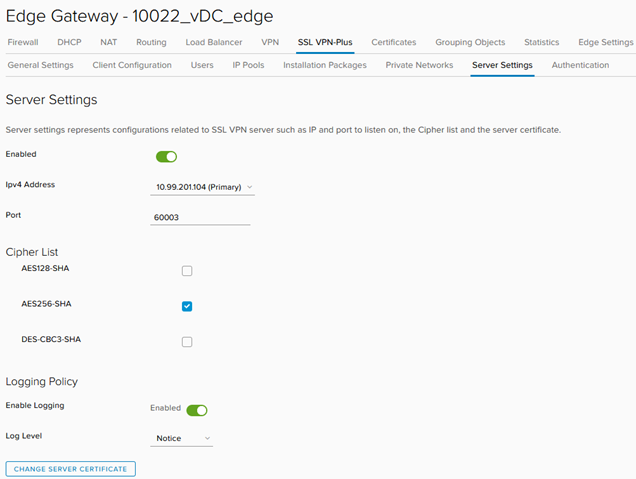
Click the “Enabled” switch to turn on the SSL VPN service, and select the external IPv4 address and port for external access to the VPN. Select one of more Ciphers, then save the settings. This will automatically populate a Firewall rule which can be verified below.
3. Verify Firewall Rule
Enabling the server from the SSL VPN Server Settings should automatically populate a Firewall rule as shown below. This rule should correspond to the external IP for the VPN and should allow TCP traffic on the specified port.
![]()
4. Configure IP Pools
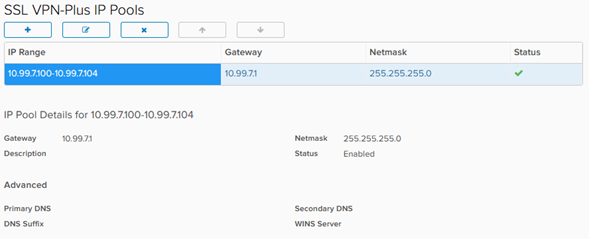
Once the SSL VPN Server has been enabled, select the IP Pools tab to create a range of internal IPs for use by the VPN. Click on the “+” symbol in the upper left to create a new pool. This pool will be the set of internal IPs which are mapped to each remote user when they connect to the VPN. These IPs will need to be on a subnet which has access to the existing environment. This IP Pool subnet should not correspond to the Org VDC Network. It needs to have a Gateway address configured, which will be the Edge Gateway’s IP on that subnet. DNS options are not required.
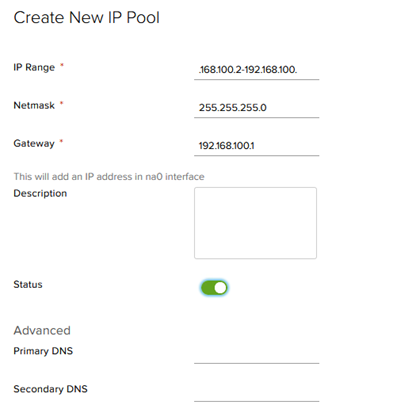
Once the IP Pool has been created, verify that the pool appears in the list and that the information is correct.
5. Configure Private Networks
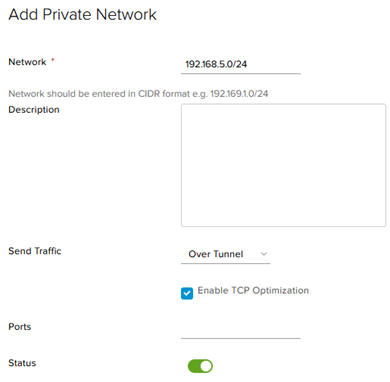
Select the Private Networks tab and click the “+” symbol in the upper left to add VPN access to an internal network. This subnet should include addresses for any servers which should be accessible to users connected to the VPN.
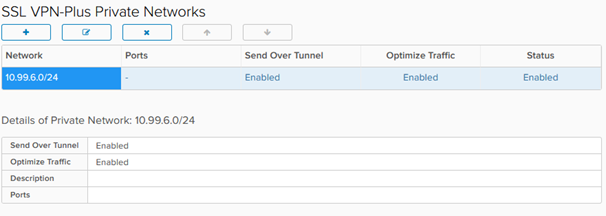
After adding the Private Network, verify that the network appears in the Private Networks list and that the information appears correct.
6. Configure Users
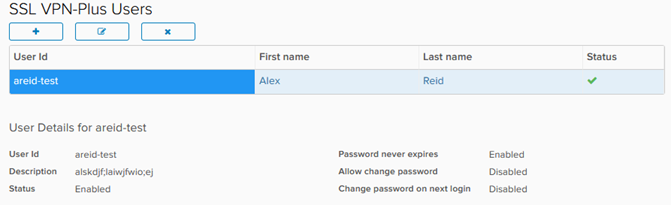
Select the Users tab to add user accounts to the VPN. Any users should be added manually here before attempting to download the client and join the VPN. Forcing users to reset their passwords on login can be enforced at this screen as well.
7. Configure Installation Package
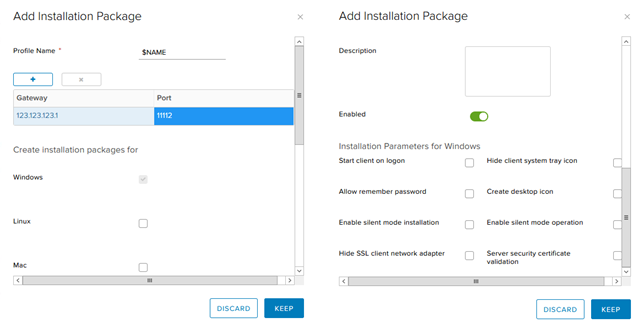
Select the Installation Packages tab to configure the package users will receive when joining the VPN. Add the Gateway IP and the Port for VPN access (as configured at the VPN Server tab above). Please note that if the Gateway IP or Port changes for any reason, the Installation Package profile needs to be deleted and re-created. Enable any necessary installation parameters (such as silent mode, or starting the client at login) and save the configuration.
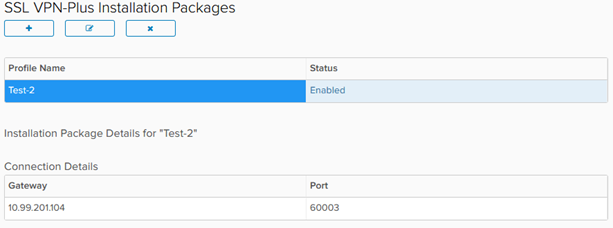
Once the Installation Package is configured and saved, it will appear in the list of packages. Verify that the Gateway and Port are correct.
8. Configure Client Tunneling
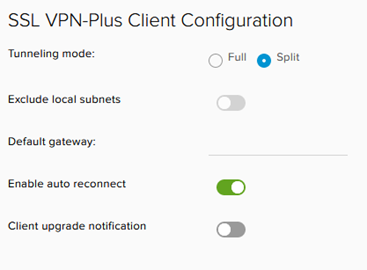
Under the SSL VPN-Plus tab, select Client Configuration. The tunnel should be configured to Split mode to enable simultaneous external communication, but can be set to Full mode if application demands it. Any subnet exclusion can be configured here as well.
At this point the VPN tunnel is configured. Users can navigate to the access point IP, download the installer, install the VPN client, and connect to the network.
9. Download & Install Client
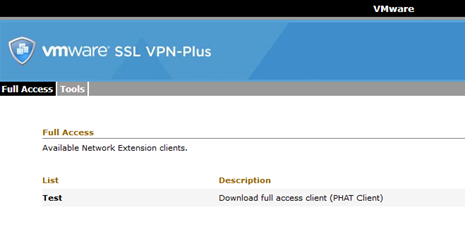
For each end user, navigate in a web browser to https://###.###.###.###:####/, the access address configured in the Server Settings tab. If the server is properly configured, the following login prompt will appear.
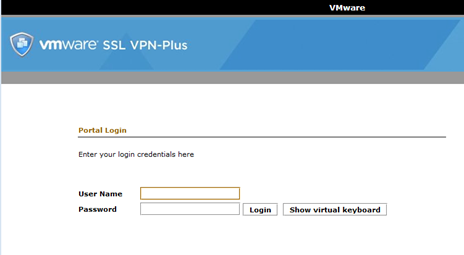
Enter the credentials for that user and select “Login”. After logging in, the link to download the VPN client will appear under “List”. Click the name of the Installer Package configured in the Installer Package tab. The download will begin automatically per the instructions of the following page.
10. Connect & Log In
After installing the VPN client, run the program. A login window will appear. Click “Login” to prompt the user for credentials.
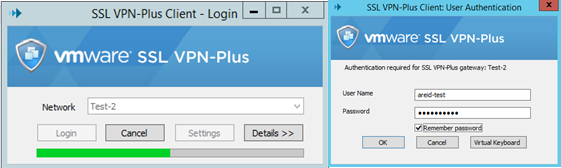
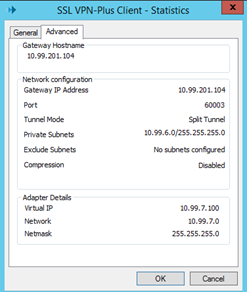
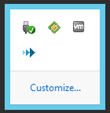
If the login process is successful, the VPN client will minimize to the tray and the VPN will establish automatically. To verify, double-click on the arrow icon in the tray as shown below to open Statistics.
In the Statistics window, select the Advanced tab to verify the assigned addresses and connection information.